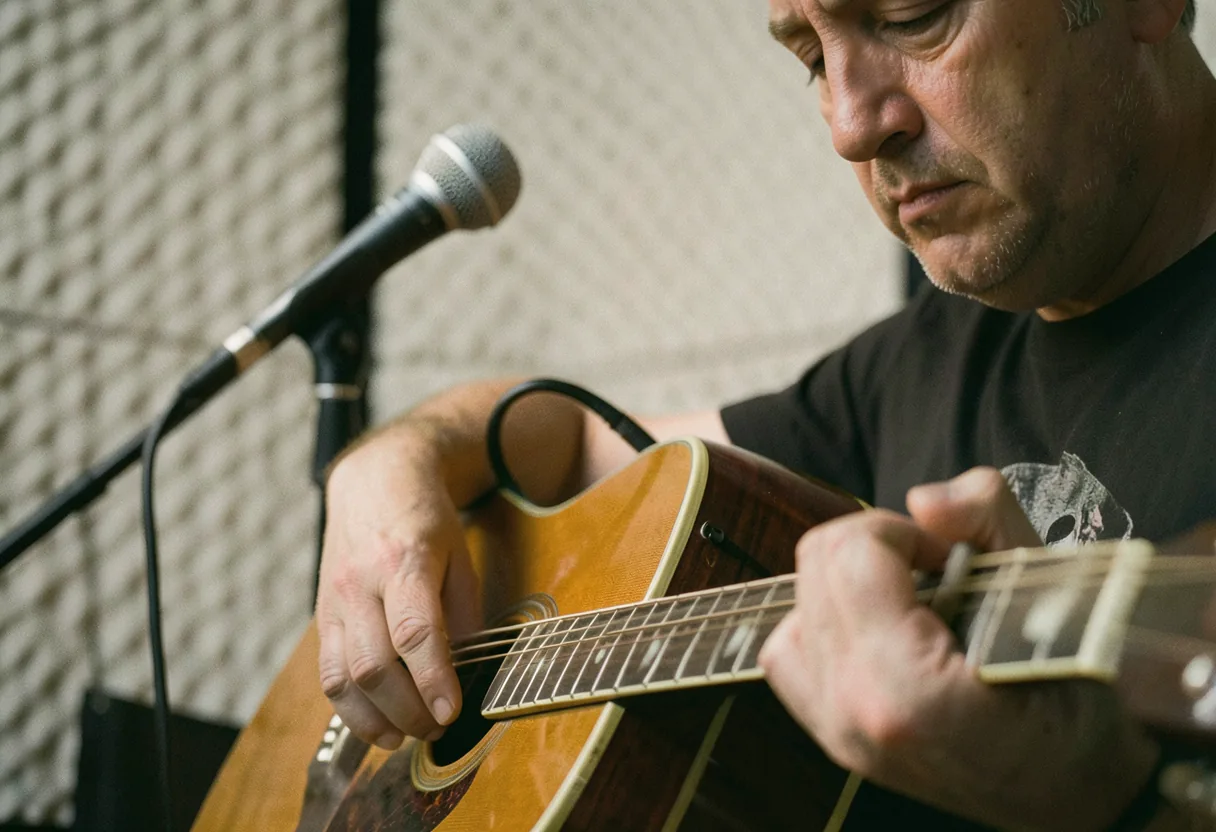
Use a large-diaphragm condenser mic like the Neumann U87 placed 12 inches from the guitar’s 12th fret, slightly off-axis to avoid harshness. Blend with a dynamic mic like the Shure SM57 near the soundhole for warmth. Adjust positions to balance brightness and resonance.
Miking an acoustic guitar for studio recording involves strategically placing microphones to capture the instrument’s natural tone and resonance with clarity and depth.
Think of miking an acoustic guitar like setting up a photo shoot for a rockstar: you need the right angles to highlight their best features, and sometimes you need two or more shots to get the full picture.
Key facts
- The acoustic guitar’s sound hole projects air, while the body produces tonal richness.
- A single microphone can capture the guitar, but two microphones allow for blending tonal qualities.
- Condenser microphones are preferred for their sensitivity to high frequencies and transient response.
- The distance and angle of the microphone(s) significantly affect the recorded sound.
01What you need
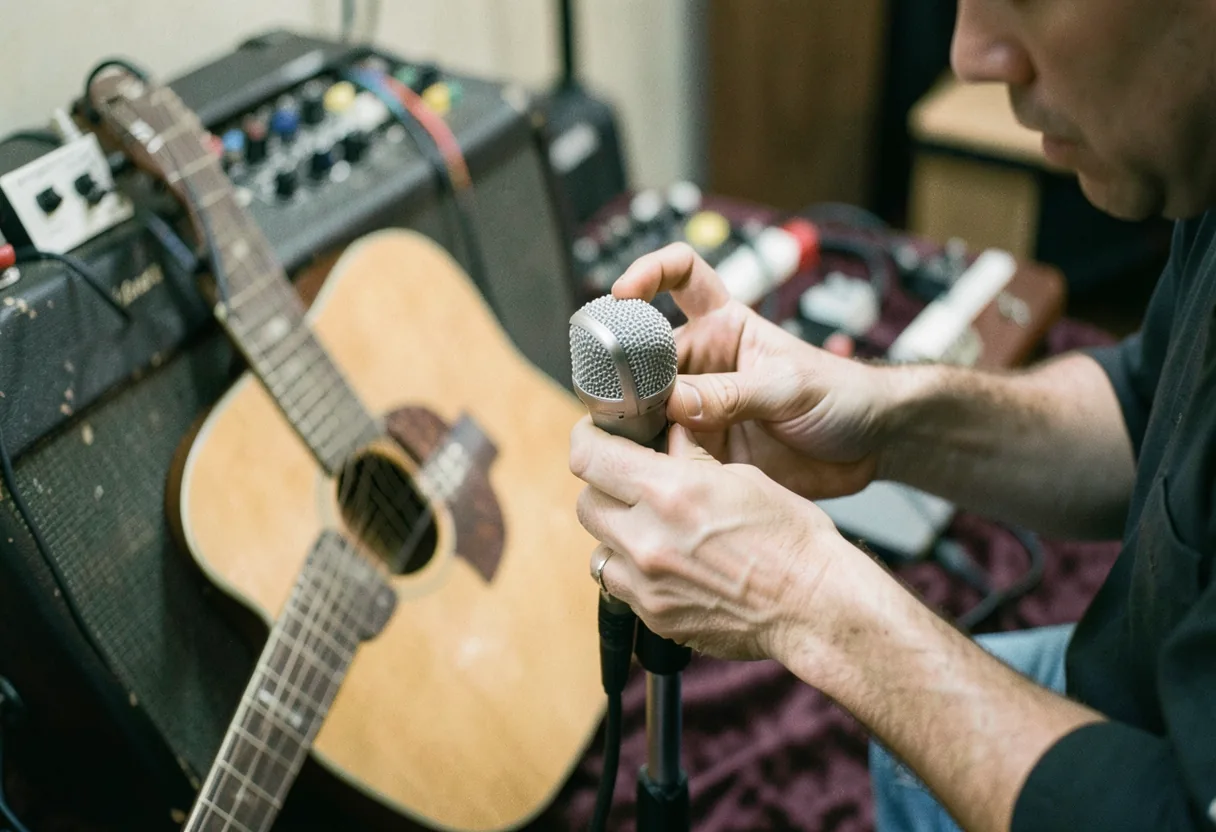
- At least one condenser microphone (e.g., Neumann U87 or Shure SM57)
- Microphone stands and clips
- Audio interface with phantom power (e.g., Best Audio Interfaces for Home Recording)
- Recording software (DAW) (e.g., Best DAWs for Beginners on Mac and PC)
- Acoustic treatment (e.g., How to Treat a Small Room for Recording)
02Step-by-step: How to Mic an Acoustic Guitar for Studio
- Choose your microphone: A condenser microphone is ideal for capturing the acoustic guitar’s nuances. Place it about 12 inches away from the guitar’s sound hole, pointing towards the 12th fret.
- Position the microphone: Angle the microphone slightly off-center from the sound hole to reduce low-end boominess. Experiment with distances and angles to find the sweet spot.
- Use a second microphone (optional): Place a second microphone near the bridge or beneath the guitar’s body to capture different tonal qualities. Blend the signals in your DAW for a fuller sound.
- Test and listen: Play the guitar and monitor the sound through your audio interface and studio monitors. Adjust microphone positions based on what you hear.
- Record a test track: Capture a few minutes of playing to analyze the tone. Pay attention to string noise, resonance, and overall clarity.
- Apply acoustic treatment: Use bass traps, acoustic panels, and diffusers to control reflections and improve sound quality (e.g., How to Treat a Small Room for Recording).
- Experiment with EQ and effects: Use your DAW’s EQ to adjust frequencies and add subtle effects like reverb or compression to enhance the natural sound.
- Finalize your setup: Once satisfied with the tone, finalize microphone positions and recording settings. Ensure consistent performance during the recording session.
03Common mistakes to avoid
Placing the microphone too close to the sound hole can result in an overly boomy sound. Avoid this by positioning the microphone slightly off-center and adjusting the distance. Additionally, neglecting room acoustics can lead to unwanted reflections and a muddy sound. Always treat your recording space adequately (e.g., How to Treat a Small Room for Recording).
04How to choose the best microphone for acoustic guitar
When selecting a microphone for acoustic guitar, consider factors like frequency response, sensitivity, and polar patterns. Condenser microphones are generally preferred for their ability to capture detailed high frequencies and transient responses. Small-diaphragm condenser microphones are particularly effective for acoustic guitars due to their accuracy and transient response. Popular choices include the Neumann U87 and the AKG C414.
The first time I really looked at microphone specifications, I realized that the polar pattern is crucial. A cardioid pattern is excellent for isolating the guitar from room noise, while an omnidirectional pattern can capture a more natural sound in a well-treated room. Understanding these nuances can significantly impact your recording quality.
05Where to buy studio recording gear
When purchasing studio recording gear, reputable online music stores like Sweetwater offer a wide range of options. Sweetwater is known for its excellent customer service and extensive selection of microphones, audio interfaces, and acoustic treatment solutions. They also provide resources and expert advice to help you make informed decisions. For local purchases, you can explore used musical instruments stores near you or visit Sweetwater Music Store locations for hands-on experience.
If you’re looking for the best online music store, Sweetwater’s website offers a user-friendly interface, detailed product descriptions, and customer reviews. They also feature hottest deals and new notable gear, making it easier to find the right equipment for your studio. Additionally, their Sweetwater gear exchange login allows for easy management of your purchases and returns.
06How to set up your recording environment
Creating an optimal recording environment is essential for capturing the best sound. Start by treating your room with acoustic panels, bass traps, and diffusers to minimize reflections and echoes. Place your acoustic guitar in a position where it can resonate freely, away from walls and large objects that might interfere with its sound. Ensure your audio interface is properly connected to your computer and that your DAW is set up for recording.
Monitor your recordings using high-quality studio monitors placed at ear level and forming an equilateral triangle with your listening position. This setup helps you accurately assess the sound and make necessary adjustments. Regularly test and tweak your microphone positions and room treatment to achieve the best possible sound.
07How to mic an acoustic guitar for studio: Pro tips
- Experiment with different microphone positions to find the best tone for your guitar.
- Use a second microphone to capture additional tonal qualities and blend them in your DAW.
- Treat your recording space adequately to minimize reflections and improve sound quality.
- Monitor your recordings using high-quality studio monitors placed at ear level.
- Regularly test and tweak your microphone positions and room treatment for optimal results.
By following these steps and avoiding common mistakes, you’ll be well on your way to capturing the rich, natural sound of your acoustic guitar in the studio. Happy recording!
08Frequently asked questions
What microphone is best for recording acoustic guitar?
A large-diaphragm condenser microphone like the Neumann U87 or AKG C414 excels at capturing the full frequency range of an acoustic guitar. Place it 12-18 inches from the 12th fret, slightly off-axis to avoid harsh highs. For a warmer tone, consider a small-diaphragm condenser such as the Shure SM81.
Should I use a single mic or multiple mics?
A single mic often suffices for a balanced sound. However, for greater control, use two mics: a condenser for clarity and a dynamic mic like the Shure SM57 near the bridge to add punch. Blend the signals carefully to avoid phase issues. Experiment with mic placement to achieve the desired tone.
How do I avoid feedback when micing an acoustic guitar?
Position the microphone close to the guitar to minimize ambient noise pickup. Use a directional polar pattern like cardioid to reject off-axis sound. Lower the guitar's volume slightly and ensure the room is acoustically treated. Avoid placing the mic directly in front of the soundhole to reduce low-end buildup.
What role does room acoustics play in recording?
Room acoustics significantly impact the recorded sound. A well-treated room with absorption panels reduces unwanted reflections. Avoid recording in a live room with hard surfaces. For a natural sound, position the guitar and mic in a space that complements the guitar's tone, such as a moderately reflective room.